Friday, 4 April 2014

So long, farewell......


Hello,

How's your week going?  The 'boyfriend' and I have been catching up with a few chores around the place. The house is tidy, windows are all clean, the floors the same, oh but the garden......... We've had a mixture of rain and sunshine so the grass grows as you stand looking at it!  Never mind we needed the rain, my hope is that it reached further inland for the farmers!

A week ago we travelled down to Port Stephens to join a dinner cruise hosted by Ian's company (well you know what I mean, where he used to work :)).  It was lovely, especially as the bosses farewelled 'the boyfriend'.

He, the same person who walked out of the office at Christmas backwards.......wanting no fuss and actually feeling quite emotional!  Didn't have to be bribed to attend (actually he did try to duck it .....spoiling the surprise somewhat LOL).

Did I smile when he stood to acknowledge the kind words, giving his own little speech.......yes I did, but I was very proud.......he spoke well!  Anyway enough of that, we enjoyed a wonderful evening leaving with beautiful flowers and arms full of gifts......such a lovely and unexpected surprise.

Make me a Thank you card will you, actually I'll need a couple, one for the Victorian office......says he!
OK.......now what to do? Flowers...Oh no.....maybe just a layered sentiment.

Here's what I decided........

I took heaps of pictures of him walking around his favourite bay and finally, between us, we decided on two. One for the front of the card and one for the back.......What do you think?


Shades of 'Reginald Perrin'** (not quite, Reginald was starkers!!) walking into the sunset!!!!  That's it for another day, off to play with card and my envelope punch board....... what fun!
 photo Signature_zpsba959cfc.png
** English Comedy TV show from years ago!

Tuesday, 1 April 2014

At last a post.......and a special Wedding........

Hello,


I know it's been a while, life has been pretty hectic here,   a fully retired husband at home 24/7 certainly makes a difference.  I'm not complaining....no, no, no, every day is an adventure!  We've managed a few road trips and even when we stay 'local' there's always time to go for a coffee, or a walk around our favourite bay with lunch sitting overlooking the view. Life is good!


As far as making cards........I've really only made those I'm committed to make, which means very few posts here on my card blog. Gone are the days of posting every day!

I do however, have one to share today.  The daughter of a girl friend in Sydney was married during March and her Mum asked me to make her a card.


The wedding had a silver/black theme so I went with a silver striped DP over a black mat and pearls.


I've had this LOTV image for so long and never used it. It's just so sweet, I really enjoyed colouring with the softest Copic colours.
The lovely sentiment is from AnnaBelle Stamps Wedding set and was embossed with silver EP.


Because of the roses this card needed a box so I used the same striped/black mat for the lid with some organza ribbon and a flower.

The hardest part of making a card like this for someone else to give, is deciding on the sentiment for the inside. Sometimes a stamped sentiment just isn't enough.
Here's what I do: Search on line, pick three sentiments, one quite plain, one a little more 'involved' and the third......well I'd say more 'flowery'. Print them all individually and arrange to the correct size adding any extra decoration etc.  then let the person decide which one they want to use.

Thanks so much for dropping by, I'll be back before too long.............

 photo Signature_zpsba959cfc.png

Thursday, 27 March 2014

SBB - Envelope Punch Board - File Folder Thank You


I'm sharing a project for Scrapbook Boutique using the We R Memory Keepers Envelope Punch Board. It's a file folder card and mine was made to send as a thank you with a small gift popped inside.  


You can find all the details with measurements over at the Scrapbook Boutique Blog today.  

Thanks for taking the time to drop by.

 photo Signature_zpsba959cfc.png


Thursday, 13 March 2014

SBB - Envelope Punch Board - Gift Packs

Hello,

Today's project is for Scrapbook Boutique and uses the We R Memory Keepers Envelope Punch Board.  Evelyn has the details over on the Blog today.


These were super quick to 'whip up' and by adding a perfumed drawer sachet (as I did in the larger one) or a couple of peppermint chocolates in the smaller envelopes............the perfect little thank you gift.

You could of course just use them to make matching envelopes for your cards....... or small boxes and gift packets..............Watch this space :)

Thanks for your visit.


 photo Signature_zpsba959cfc.png

Monday, 10 March 2014

Scrapbook Boutique March Inspirational Challenge and Blog Hop


Hello, hello,


It's time for another BLOG HOP and Inspirational Challenge from Scrapbook Boutique . 

The Hop starts and ends at the Scrapbook Boutique Blog.  If you're following along you should have arrived from Melissa's blog and when you leave me you hop over to Therese's Blog.

The hop is open for one week, closing at midday Monday 17th March. 
To be eligible to win the prize, leave a comment on each of the blogs, with the SB blog being the last one.  The random winner will be drawn from the  SB blog and announced on Tuesday 18th.

Unfortunately the blog hop prize (and the inspiration challenge) are only open to anyone with an Australian mailing address.

Join the Blog Hop and you could be the lucky person to receive 'Nature's Wishes" from Penny Black.


~~~~~~~~~~~~

Join us if you can for our regular monthly inspirational challenge.
   Make a project using the following picture as your inspiration.


You could be the winner of a $30 gift voucher for Scrapbook Boutique.  

~~~~~~~~~~~~~~~~~~~~~~~~


I took the shape from this picture as the starting point for my card this month.  The colour pink was next followed by the pretty daisies.

Here's the card I made:


I used my die cutter to create the shape for this card.  This card is 5" tall and 5" wide.  Click HERE  to download a copy of my shaped card base.

  • Cut the base card from pink card.
  • Cut a second shape 1" smaller from DP. Adhere to card front.
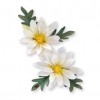
  • Die Cut the Daisy petals from white card with the leaves and centre from green.
  • Shape the petals and adhere to the green centre. Dries Clear Adhesive is the adhesive I use for this work.
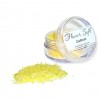
  • Add the daffodil Flower Soft to the centre of the daisy, using the same adhesive as the previous step.
  • From Pink card die cut the 'hello' sentiments. Adhere to card front. An X-Press It Glue Pen makes it easy to add glue to the rear of this fine cut sentiment.
  • Position the daisy over the leaves and adhere to the left of the sentiment.
  • Add the Pearl Swirl above the daisy to complete.

Thanks for taking the time to call past today, enjoy the rest of the hop.................


 photo Signature_zpsba959cfc.png