Tuesday, 10 February 2015

Scrapbook Boutique February Blog Hop and Challenge


Time for another BLOG HOP and Inspirational Challenge from Scrapbook Boutique .

The Hop starts and ends at the Scrapbook Boutique Blog.  If you're following along you should have arrived from Narelle's blog and when you leave me you hop over to Therese's Blog.

The hop is open for one week, closing at midday Tuesday 17th February. 
To be eligible to win the prize, leave a comment on each of the blogs, with the SB blog being the last one.  The random winner will be drawn from the  SB blog and announced on Wednesday 18th.

Unfortunately the blog hop prize (and the inspiration challenge) are only open to anyone with an Australian mailing address.

Join the Blog Hop and you could be the lucky person to receive 
a $10 gift voucher to spend in the store.


~~~~~~~~~~~~

Join us if you can for our regular monthly inspirational challenge.
   Make a project using the following picture as your inspiration.


You could be the winner of a $30 gift voucher for Scrapbook Boutique.  

~ ~ ~ ~ ~ ~ ~ ~ ~ ~ ~ ~ ~ ~ ~ ~ ~


I thought it might be fun to recreate the inspiration photo using the Silhouette Cameo.

My challenge was to create a scalloped card from scratch.  I tried drawing a large circle followed by smaller circles around the the edge but there was a much easier way......Thank you  Google  :)

  • Follow this tutorial to draw the scalloped circle.  
  • Enlarge to measure 5 inches then mirror it above.
  • Overlap the scallops where the two images meet and weld.
  • Draw a dashed fold line at this point. (to stand the card on the bottom two scallops, the fold will be at approx. 10 o'clock.)
  • Send to Silhouette and cut from white card.
  • With the scalloped card still on the desktop, draw a circle and size to fit within the scallops. For now click on 'no cut' in the cutting window.
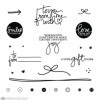
  • Move base card off the desktop. Chose a font and type happy birthday. Double click on the sentiment and drag it to fit within the top of the circle.
  • Exchange the cutting blade for a black sketch pen. Send the file to the silhouette and watch in wonder as it writes your sentiment over your chosen DP. Don't remove the cutting mat between writing and cutting.
  • Replace the sketch pen for the cutting blade and in the cutting window click on 'cut edge'.
  • Adhere the sentiment DP to the front of the scalloped card.


  • The cupcake was designed in three parts, filled with colour and welded together.  The fonts were added to the cream topping and slate, then filled with colour.
  • This image was being printed to white card first, so I added the registration marks.
  • In the software I selected cut edge in the cutting panel. Added the printed image to my cutting board and cut the cupcake out.


  • To complete the card I popped the cupcake over the DP using foam squares.
Now on with the hop.......thanks for your visit :)


 photo Signature_zpsba959cfc.png

Sunday, 1 February 2015

Cameo Valentine so very CAS


Hello Bloggers......a bit quiet around here but the boss and I are packing up and selling all the stuff we don't think we'll need anymore.  It's a big job but it feels quite liberating, 'stuff' weighs you down and we want to be able to just 'pack and go' when the mood takes us!

I do have a little card to share today though. I thought I should have one ready well in advance. It's another Cameo designed card, I have a few that I played with but this was just very CAS and made up in a spare few minutes :)


  • In the Studio Software I drew a rectangle with rounded corners sized to 5.25 x 4.00 inches.
  • Next I drew a heart shape with an outer dashed line and 
  • A rectangle with rounded corners sized to 5.25 x 4.00 inches  was added around the heart shape, making sure to centre the heart. 
  • I picked a font to sketch the word Sweetheart, sizing it to fit within the cut shape.  
  • I sent the sketch penned sentiment through the Cameo first then added my DP to the cutting mat to cut the heart.
  • I centred the sentiment behind the DP with double sided tape. Then popped up the piece over a plain white top fold card, using foam tape.
  • To complete the card I added a half pearl flourish.


I cut an envelope for this card too.  This design came from the SIL Store and I just cut a panel from the front to add a plain white addressing area.  How fabulous to be able to make matching envelopes for my cards.....love that!  The DP is from a cheap 12 x 12 pad I bought in Aldi .....of all places.  It's the perfect weight for an envelope.


Thanks for calling past, now back to work for me :)


 photo Signature_zpsba959cfc.png

Thursday, 22 January 2015

Anyone for Tea?


Hello bloggers,


I saw a teapot cut file over on Bird's Blog and thought it would be great to have for a quick thank you.


On the inside of one I've stamped 'Thank You' and added a wrapped tea bag.


I also added a pretty label I downloaded from the SIL store to the front.  Using a font from my computer I typed the word Tea and welded it to the inside of the label.


This one has the tea bag inside and a hand written message.
'When you sip this tea, think of me'.


Such a cute little gift to have put aside for just the right moment.

Thanks for dropping by.


 photo Signature_zpsba959cfc.png

Monday, 19 January 2015

Floral Alpha's and the Silhouette


For a long time I've been collecting fonts, downloading them to my computer, installing some of them but not all.  I can't help myself, they are the same to me as  pretty papers and inks.  I occasionally add a computer generated sentiment to a project or card but now with the Cameo I can use my fonts to make cut files.  So far I've cut some small images from card to use with my Journals, December Daily etc.


I've put an order in for some Vinyl and can't wait to try some small pieces.  I'm thinking maybe some small monogrammed pieces for the new house.

A visit to MaritzaLisa's blog introduced me to a stunning vintage and eroded font from Iranian Designers Zahra and Amir that was featured here by Noor.  I followed the trail and downloaded a copy to play with.

I opened the images in Studio and used the trace feature to pick out the letters I wanted to work with.
Copied each to another file and sized them before sending them to the Cameo to cut.


I printed my first three letters at just 2 inches high for the capital 'S' and 1inch for the rest which made it the perfect size for the front of my notebook.


Next, I used some 3" tall letters to make cards, I love the B.  I added some twine and a few AnnaBelle's Sprinkles to complete the front of each.


I really like the idea of a set of notecards using my initial in this way.  I used a Flourishes stamped sentiment and a Copic black slim pen to draw the dashed lines.


I've added a reminder to cut the word 'Inspire' to attach to a pin board for my new craft room, what do you think?


Thanks for dropping past today, please go visit with MaritzaLisa  and follow the trail to this lovely font for yourself.  You could hand cut most of these if you're not a Cameo owner :)

* Edited to give the correct information and credits.
 photo Signature_zpsba959cfc.png

Saturday, 17 January 2015

Birthday Balloons..........

Hello again,

Here we go, another of my designs using the Cameo.  I really enjoy the design process with the studio software.


The challenge for me with this card was to create the frame with the Enjoy sentiment strip over the bottom , but to also carry the balloon strings beneath the sentiment banner. 

The balloons are made up of an oval with a fine outline. A small circle, a triangle and a tall thin rectangle.

The frame is a rectangle with a slim outline which is then sized to fit the card front. Once done the frame is made into a compound cut, which means the centre is cut away.

The 'Enjoy' sentiment was typed in my font choice and centred into another rectangle .

It took me a while to work out in which order to add the different elements but basically it was just getting things in the right order. It cut perfectly in one piece ready to add to my card front.

I also made a copy of just the balloons to cut twice more for the coloured infills 

Once the piece was cut I adhered it to a lavender background then added the coloured infills.  To complete this card I added some glitter to the balloons.


The lovely Darnell has a fabulous challenge that she calls NBUS (never before used Schtuff) and as this is my first card using this new design of mine........I think it fits the bill!  


Darnell is also guest designing for CASology 129 with the chance of entering both challenges......well why not :)


Thanks for your visit today, 

 photo Signature_zpsba959cfc.png

Thursday, 15 January 2015

Scrolls and Flourishes in Shades of Blue.


Hello, hello,

I think I should explain, the majority of my stamps have been packed away in boxes, ready for 'The Move'.  The said 'Move' should have been a little further advanced but Christmas rather threw a spanner in the works!  Real Estate agents and Solicitors take annual leave and everything seems to grind to a halt.  We hope this coming week should see everything  pick up...fingers crossed.

Thank goodness for my new Cameo.  So many features to explore and get used to.  Lots of these latest projects will be made using this fabulous machine. Then maybe back to using some digital images and my colouring pens.........bliss.

My share today uses a graphic by Cocoa Mint that I downloaded from Creative Market .  Once I had it on my computer I merged it into a studio file,  then using the trace feature traced the design for cutting.  To complete the cut file I added a rectangle cut around the design, rounding the four corners.


I've popped the cut card up on foam tabs over a layer of navy card.  The Celebrate cut is from the SIL store and I cut min e out from $ store thin glitter paper (which cut very easily).


Some enamel dots add a little extra embellishment for what I'm thinking is my first Male card for 2015!


It's good to see you here today, thanks for calling past :)