Sunday 28 February 2010

February Bouquet!!!


Hello,
I'm typing this in the middle of a thunder storm so I'll keep it short and sweet!!

This is a card I made for 'The Roses' monthly challenge! The Roses being Connie, Olga, Betty. Kym, Kerrie and myself. We are all members of Stamp TV and decided to have our own little monthly challenge. I chose for this month to make a card to send to all at GKD to say thanks for a year of fun and friendship.

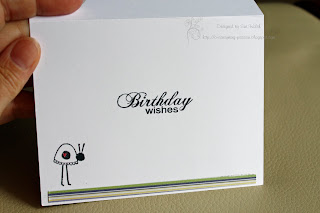
This wasn't my first card but I like this one more so decided to go with it. The stamp is from Whiff of Joy, Birdie Love by Elizabeth Bell. Coloured with Copics and sitting on dp from the Basic Grey, Sugar Rush paper pad.


Just to prove it is a thank you card.......I stamped the sentiment from 3 GKD sets on the inside!!

It's in the mail tomorrow.........

Hope you like this one, Kym gets to choose the challenge for next month and she loves digi stamps so it just might be to use a digi!!!!!!!

See you tomorrow with my card for Magical Monday, hope you can pop by.

Till then........

Wednesday 24 February 2010

Bloom in Love - STVSCJH12


Hello,

First of all I'd like to thank all my blogging friends for their cards and Birthday wishes. I've been receiving cards during the week it's been so much fun, you are a very talented bunch!!!

My card today might just be in time for the sketch challenge on STV. I never used to miss their sketch but have been very slack off late so this week I was determined to get one in. Jennie has been hosting and her sketches are all so good.

I've used a couple of my new stamps from Whiff of Joy 'Birdie Love' stamped onto GKD pure luxury card with Memento Tuxedo Black, then attached to some scalloped SU almost amethyst. Tied a bow in some green organza ribbon to complete.

The dp is from Kaisercraft Lilac Avenue Collection and I cut out the scalloped edge from one sheet to give the left side detail. Some Kaiser green gems complete the embellishments.

I couldn't decide which was the better shot, right angle or left!!!!


Thanks for taking the time to pop in today, hope you like this little card......

Till next time........

Monday 22 February 2010

Magical Monday ...... Lucky Bear

Second post of the day scroll down for my note cards.


Hello,

This weeks cute image from Nina of TMITA/PCC is 'Lucky Bear'. Nilla's turn to challenge us today and she asked for some distressing, Use any technique for distressing, roughing up your paper with your scissors, distressing with inks, sanding, scraping.

So for my card I started with a base card of SU Sahara Sand.I distressed pale pink card and the spotted dp,using the blades on my scissors and rolling the card slightly. Layered them turning one corner on the dotted card and stitched a couple of rows of 'not so straight stitch' around all four sides.
Lucky was printed, coloured with Copic markers and cut out. For the clover leaf motiff (I'm calling balloons) I added some fine silk ribbon tied in a bow.
Lucky sits, popped up with foam over a piece of green hand cut paper that grounds him.......he's walking on grass holding his balloons!
I added the button over the turned down corner and a lace bow with a button centre in the opposite corner.
The Birthday wishes sentiment is from a GKD set , stamped onto some pale pink card and cut with a Spellbinder Petite Oval die.
Thanks Nilla this was a fun challenge, I hope you'll all join in this week. We love seeing what you come up with.
As always Nina has a prize for the randomly picked winner.

I also know there are lots more new images over at PCC so why not drop by for a browse.......

Till next time........


Just a Note boxed set......


Morning blogger's,
hope you all had a great week end, I know there was more snow in the UK. Spoke with my Mum yesterday and she was really fed up with the weather. The US, or parts of it, is still suffering too I understand. Here in Sydney we had the best week end we've had for ages - go figure.

Two posts today, this is the first my little boxed set of note cards. I made these over the week end for a friend of mine who needs a bit of cheering up. We've arranged to have a coffee on Wednesday so I hope she likes them.
The Stamp is from the latest STV kit the second set called 'Picture it'. The dp is from the Kaisercraft pad Lilac Avenue Collection.
I used my Copics to colour the daisy image and the block stamped image was inked up with SU Kiwi Kiss. Memento Tuxedo Black was used for the sentiment which is from another GKD set called Tropical Windows.

I'll be posting again later this evening for TMITA/PCC Nina has a beautiful little image available to play with I think you'll like it! Nilla has set a challenge for us this week so hope you can drop back a little later for this post.

Blogging friends meet!!


Walshie and I spent a great day on Saturday with Jose and her husband John. Jose and I met through blogging and STV. When I heard she was coming to Sydney we arranged to meet and spend some time together. Well we met them off the Manly ferry, I arranged to wear the red top I have on in my online picture and Jose sent me an up to date snap of her and John. We spotted each other right away and spent the next eight hours chatting like old friends. It was the best day! We had a drive along the northern beaches with coffee at Whale Beach then came home for a late lunch. Only when it was time to leave did Ian remind me to take a couple of photos so this was taken on the front door step lol!!!

I hope you get to meet up with some of your online friends it's the best part of blogging!!!!!!

Till later.......

Friday 19 February 2010

Feelings of Hope


Feelings of Hope


Gina challenged the CenterStage Spotlight team to make a card with the new Hope is Faith stamp set using the photo above for inspiration. Check out Gina's blog for all the details on this special stamp set.


I've had some fun with my set already.....so I'll share three projects with you today. Two quick and easy ones and this one that takes a little longer to put together.


This is my piano hinge album, made with three sheets of 12 x 12 inch card and some barbecue sticks. Three sheets of card cut to 6 x 12 inches gives you eleven double pages to fill. I've yet to complete my album but will share when it's done.

I've used the butterfly image to decorate the front cover. Stamped in SU chocolate chip onto Pure Luxury Ivory card and coloured with Copic markers. It was cut out and attached to the dp (Basic Grey - Sugar Rush) with a foam tab. The shabby flowers were each cut from three scraps of orange card, with the Blossom Spellbinder die. Scrunched up then opened and inked around the edges of the petals. Some buttons, ribbon and gems finish the flowers and stems.
The sentiment is stamped onto the dp in chocolate chip ink, which just left the two opposite corners to decorate with three Kaisercraft gems each.

This is what it looks like open, you can see that you weave the sticks through slits cut into the spine. To hold the sticks tight I wound Dental Floss over and under each stick and just lightly glued the tied off knot. I threaded some glass beads onto the top threads.


I should give credit to Lorraine an English crafter who posted this on a blog site in the UK. I made mine from memory...... think I got it right. She also made an Art Journal which she bound beautifully...... I hope I find the site again I'd love to try one.

My second project is a card using GKD green card with an oval cut from the front. The image is stamped in SU chocolate chip onto Basic Grey dp on the inside of the card.
I've added some GKD cream flowers coloured with Copic markers and set with Kaisercraft gems. These petals curl so well around a pen, which I think makes them look more realistic. Mine sit on some light green punched fern. To complete the card I added more gems and some green organza ribbon.


For my last project I made two 'matchbook' treat holders. These are so quick and easy to make and the perfect way to give a small gift or in my case a voucher.

I stamped the butterfly in SU chocolate chip twice then cut them out. One I cut the body and the left hand wing as one, then the second one was the body with the right hand wing as one. (Hope that makes sense when you read this!!) Basically you use the same wing twice for each butterfly to get a side view of him!! The top wing is attached with some foam tape and curled very slightly. Some gold wire added to finish him off.

I added the punched strip of dp across the top fold with some green ribbon. The butterfly sits on some lighter green card cut with a Spellbinder Labels die. Three gems complete these 'matchbooks'.

So would like one of these stamp sets? check out the link to Gina's blog at the top of the page for all the details.

Thanks for stopping by today, now are you ready to see some more ?

Then, stop by these designer's participating in the hop tonight:


Have fun, till next time..........

Thursday 18 February 2010

Purple, Pink and Grey for Annabelle


Hello....... I've been rushing around a bit today ...... hair needed a trim.... washing out whilst the weather is fine general clean and tidy around my little painter and decorator you know the story!
I wanted to get this card photographed and posted and ended up at 10pm taking the photo in my craft room....... sorry it's a bit dark.

This is a card for Andrea's Saturday sketch 130210 and also for the new Helen Dooley 'For Fun Challenges'. Have you found this one yet......go check it out!


Here is the sketch for Andrea's challenge:


Helen's challenge was to make a pink, purple and grey card....... here's mine.


The stamp is from Annabelle Stamps called 'Flowers with Love' and I've just used the head of one of the flowers and stamped it three time in Memento Tuxedo Black onto GKD Pure Luxury pure white card. Coloured them with Copic markers and cut them using a Spellbinder circle die.
I've used a pale purple card for my mat with the pink and grey dp from All My Memories Studio Collection. The pink punched ribbon was punched using a SU lace punch.
I flipped the dp and used the solid grey side to sit the stamped images on.
The sentiment from the same set is stamped using Brilliance Moonlight White.

For a little bling I added two pink sprinkles, also from Annabelle Stamps, and three small purple gems for the centre of the flowers.

So I hope you'll have a go at both these challenges . Annabelle stamps now have a group on
Scrapbook News and Reviews Magazine, check that out too if you have a moment.

Tomorrow I'll be posting at 3pm (Sydney time). I'm joining a blog hop with the other Stamp TV CentreStage Spotlight team hope you have time to call by to see my projects.

On Saturday I'm spending the day with a blogging friend from the UK who is in Sydney for a couple of days before joining a cruise!!! Keep your fingers crossed for fine weather for us.... sight seeing isn't much fun if it rains!!!

Till tomorrow............


Tuesday 16 February 2010

ABSC0014 - Just because.......

Hello Blogger's,

Hope all's well in your part of the world today.

Mr Random Org was very kind to me just recently, I entered one of my CAS cards in Andrea's Saturday Sketch over on Stamping Moments and was lucky enough to be one of two people picked for the following yummy candy. This beautiful little stamp, one of Annabelle Stamps new release sets called Flowers With Love and some 6mm Sprinkles in pink. Thanks so much Andrea I'm going to have lots of fun with them.

My card is for this weeks bling sketch challenge on the Annabelle Stamp Blog.

The stamp which is called Party Cupcake was stamped on PL pure white card and coloured with Copics and a glitter pen. I used a Spellbinder circle die to cut the image.

I covered the base card with a sheet of Bazzill pale green and added the faux stitching with a white gel pen. The dp is from DCWV Nana's Nursery.

The sentiment, which is from the Flowers With Love set was stamped using Memento Tuxedo Black. Cut wih a small circle die before adding the punched flower and pearls.

I've almost caught up with the boring household chores so hope to get stuck into a few more projects and if I've missed your blog posts I'm really sorry........ I will catch up!

See you soon.........


Monday 15 February 2010

Magical Monday.......'Be my Tweetie'


Hello Blogger's,

Today on TMITA/PCC Nina has asked us to make a card using any of her images or the one she has on the blog today.
It's Selma's turn for the challenge this week. Selma has asked us to use a circle and some lace.

I chose one of Nina's new images for my Card 'Mr Twitter'. Just click on the Paper Cupcakes blinkie on the side panel here to go take a look at all the sweet images available.


I know I probably say it every week but I love this image, he's just so sweet!!

So what have I done...... printed him once sized, and coloured with Copics.
Cut with a Spellbinder circle die.
Gathered some lace then pierced around the circle to add the lace by sewing through the pierced holes to the back of the circle.
At the same time adding the pink bugle beads around the front.
That was the image ready to go.

My base card measures 5.5 inches square and I used GKD pure luxury heavyweight card in Ivory. To this I added a layer of American Crafts scarlet followed by the DP which is from Cloud 9Design called 'So in Love'.
Using a Martha Stewart Daisy Fan Punch I punched some of the Scarlet card and finished this with a layer of Cloud9Design 'Love U Dots'. Once this was added to the card I've added the two little heart embellishments which I'd coloured with Copics. The image was attached next with some foam tape to pop it up.

I added the two Mulberry roses and the red ribbon rose over some punched fern. Added the pink stick pin and the cream flower embellishments with a Kaisercraft pearl as the centre.

The sentiment, 'Be my Tweetie' is computer generated onto more Ivory card cut using a Spellbinder heart die (thanks Kez, need to add one of these to my wish list!) as was the scalloped scarlet matt. To sit this at the angle I attached the sentiment onto a narrow folded strip of card and just tucked some foam tape into the crease. This next picture shows how the sentiment sits at a slight angle.

On the inside of this card I just punched a small heart that sits centred on the left hand page.


This card needed it's own box, so I made a plain white box and decorated the lid as follows:
1st layer: scarlet card.
2nd layer: Love U Dots dp set to about half point followed by......
3rd layer: Daisy Fan punched from 'So in Love'. To sit along the base with some pale pink ribbon tied to the side over the join of the two DP's.
4th layer: Cuttlebug embossed Scarlet card cut with the scalloped heart die in two sizes. The smaller one popped up with foam tabs. This embossing folder is called Kimmy-Luvs !!
5th layer: I used the 'I heart you' image from PCC printed it quite small, coloured it with Copics and hand wrote the 'for you' sentiment. This image was cut out and attached with more foam tabs.
To finish my box I added the tiny pearls and another coloured heart in the top right hand corner, and a larger pearl between each of the fans along the bottom.
Phew...... it was easier to make the card than write about it!!!
I had lots of fun with this one and when it was finished gave it to Walshie saying this was a card for him to give me this year!!!!
I don't think I could part with this one.....lol.

Are you going to take Selma's challenge this week? I hope so, check out the DT's cards I'm sure you'll find lots of inspiration and there is a prize for the randomly picked winner.
Check this out........ Now who couldn't use these embellishments!!!!!
Looking forward to seeing all your creations.
Thanks for stopping by today, till next time........


Monday Morning blues......

Good Morning Blogger's,

It seems like ages since my last post........I've been up to my elbows in paint! Not the craft kind but the horrid household type....yuk. A week ago last Thursday I decided to bite the bullet and clear our bedroom ready to paint it out....... Now I know it sounds easy but nothing is easy in this house!! The bedroom has one wall with three doors on it and the wall is cedar clad. The three remaining walls are painted brick one has a small window and a second has a large window. The remaining wall has cedar at the very top above the brick going up to the high part of the roof!!! (no loft in this house). The windows are all stained dark ( think black).

Because I wanted to paint all the cedar and the windows in a bid to make the room lighter and little more 'modern' it all had to be sealed. Well the windows look 5 coats before the final coat and the cedar walls took 4 before we could add the colour!!!!!!!

We're almost done, thankfully, just need to complete the trims and the last of the skirting and two doors. Then we move into the Walk-in Robe and en suite, the hardest part of this will be clearing out the Robe!!!

Walshie fell off the ladder with a full tin of paint in his hands........ once I knew he was OK it was hard not to laugh cos his face was covered in Dulux Hog Bristle!!!!!! Thankfully the drop sheets collected most of the spillage, so they were easy to scoop up and put in a bin bag along with Ian's clothes!! We have to replace the carpet but that's not so bad and the other good think is that I didn't like the look of the full strength colour so got to replace it with quarter strength. OMG I'm turning into my Mum!!

It's been like a mad house, the weather has been so humid - so paint takes ages to dry.
I've had drop sheets down everywhere from the bedroom leading to outside - just in case!!! By the time evening comes round I just flop into a chair so tired .

I've been working on a couple of things I'll share with you soon and getting ready for a Stamp TV blog hop on the 18th. Later today I have my project for Selma's Challenge on TMITA/PCC so I hope you'll pop back for that.

Enough of me going on I'd better get some washing on the line the sun's out (for a change).

Hope to see you later.....

Wednesday 10 February 2010

Desk Calendar


Hello,

I really enjoy Carolina's Anything but a Card Challenge on STV and last weeks was to use a 'Bulldog Clip' or Paper Clip and Tissie it up!!!

I thought it would make a wonderful way to display my desk calendar ..... What do you think??


This is a plain black Bulldog Clip with some polka dot dp adhered to the front. Over that I've attached my sentiment (two GKD sets where used here).

Using a Spellbinder blossom die I cut three size blossoms from three red scraps, scrunched them up then opened them out and inked around the edges roughly. A lemon button sits in the centre and I also punched some fern and attached this behind the largest blossom petals.
Then just to tidy it up I punched another large blossom and stuck this over the back.
A glue dot holds this onto the clip. A scrap of green ribbon was tied on next to finish the clip off.

The calendar is a 3.5 inch copy of my large calendar. In Photoshop Elements I put six of these on one A4 size page, leaving a small gap between each one. Printed out 2 sheets and them cut them to 3.75 inch and sat them onto 4" square SU Sahara Sand card stock. One month on either side so 6 cards in all.
I've used several of the GKD sets to stamp a small image in the top left hand corner of each month, coloured with Copics and/or Prismas and added either a gem or a pearl to finish off.

Hope you like this ........ Carolina has given us some wonderful challenges, I might not make mine in the challenge week but I try most of them. I'm loving this one it looks so cute sitting on my desk.
Till next time.........

Click on the ribbon in the side bar for the chance of some wonderful candy!!!

Tuesday 9 February 2010

Wednesday.....


Take a cute image, some pretty paper and hours of playing......... yes I'm a slow card maker!!!
I was pleased with this one when it was finished though so who cares.


The image from Precious Moments (thanks Juls) was coloured with Copic markers and cut with an oval die. A scalloped oval in LL is used as the mat and I just placed a dot in each scallop with a silver glitter pen. Foam tape was used to attach the image to the card.

My base card is SU Lavender Lace with a layer of white followed by Kaisercraft Lilac Avenue Collection dp.

I used a zig zag stitch around the circle added some pale lilac satin ribbon. Then to complete my card added the Mulberry Roses over punched fern, a stick pin and four hearts

I added the mulberry roses to opposite corners sitting on punched fern adding a stick pin to the top one. To complete the card I added the four hearts.

When you write it down it really sounds straight forward........ so why does it take so long???

I have to make a box for this one as it has to be mailed - wish me luck though.... Mum's card, along with her gift pack hasn't as yet reached her and that was posted three weeks ago!!!!

Thanks for stopping by today, till next time.........

This card is entered in the following challenges:

CPS 153 a sketch.

Monday 8 February 2010

Another Magical Monday.....

<


Hello again,

Well after my tale of woe this morning the sun came about about mid-day...... I've been outside and had a tidy up. One load of washing is blowing on the line and I managed, what I hope will be the final undercoat of paint on our bedroom windows.... yeah a good days work!

I was up early this morning checking all the tags made with last weeks I Heart You teddy image.
I loved them all, you girls who entered last week did a great job. Theresa, who has a fractured wrist joined in too, making a tag using Photoshop!!!!! Fantastic effort ... wish I could have done that!!!

TMITA/PCC has another great challenge for us today.
Nina has given us yet another sweet image to play with 'Flight of the Fuschia' and it's Patti's turn to set the challenge.
We've been challenged to make a 'Comforting" card (thinking of you, get well, sympathy, etc.), using Flourishes and/or Pearls. So here is my card 'Wishing you well".

I sized then printed the image, coloured it with Copics then cut it out. Not sure you can really see it here but I actually popped up one of the petals with a foam dot to give it some dimension.
My base card is white with a layer of pale lemon followed by the dp which is Basic Grey Sugar Rush. I used a Martha Stewart Daisy Fan punch to punch a strip of pale lemon card. Added some satin ribbon . I've attached the image with some fine foam tape to pop this up just above the dp.
The sentiment is from a GKD set stamped in Memento Tuxedo Black onto more of the pale lemon card. This sits on foam dots with two hot pink pearls. To complete my card I added two more pearls, one in each top corner. I'm hoping Patti won't mind that I didn't do flourishes....I would have loved to but don't own any........they are on my ever growing list...... but you know what that's like .....right?

Hope you'll play along with us this week, check out TMITA/PCC for the image and follow Patti's challenge. The randomly picked winner will get to pick one of Nina's images from her Paper Cupcakes online store. Good luck.


Till next time.........


Good Morning from a very soggy Sydney


Morning Blogger's,

Just popped in before I post for TMITA/PCC later this evening.

We've had a mad week end ...... Saturday it rained solid all day and most of the night. Eight inches they reckon we had - don't know about that but the pool is full to overflowing and I lay in bed listening to the water running over the rocks to the side of us last night.

Walshie and I started decorating our bedroom on Thursday.... which in hindsight was not one of our better ideas. I stripped the room out and had all kinds of washing that I couldn't get dry without the aid of the tumble dryer!!!

So no cards made this week-end , will try to get back on track soon as possible.

I know lots of you are dealing with snow and freezing weather I hope you're keeping warm and safe.
Hope you can call back later today when I have my project using another of Nina's lovely digital images.

See you later........


Thursday 4 February 2010

Take an empty teabag box..........


Hello,
Wanted to share with you today a project I made using an empty box of Tea Bags!!!!

The latest STV kit is called Organize it! it's full of word and shape stamps for notebooks, index boxes etc. As soon as I got mine I went to the bin I keep all those things I find that might just be useful!!!!! Do you have one of those?
I had kept an empty Teabag box that had a flip top lid, because it was quite rigid..... to good to throw away! Out it came and this is how it ended up:


Here it is open:

Two things I have to tell you.......
1. I have now covered the inside edges of the lid.......I took this picture then realised it looked half finished so covered it.
2. More so on the first picture but the stamped 'CARDS' tag looks like a smudged stamp and it's not it's something to do with the cropping down of this picture.....sorry.

You will notice I made a couple of inserts for my box for Male and Female cards ( sadly I only had stamps for Boy and Girl........la di dah).

I covered my box by opening it flat then with some SU card in my favourite colour combo covered the box tracing and cutting the lid sides by hand. The ribbon was added before gluing the sides back together, just to keep it tidy.


The inserts are two pieces of American Craft card in Caramel with the tabs, also doubled, set between them. I plan to type all the birthday's onto some heavyweight paper and attached this to the front of the dividers. This way as I make the cards I can tick of the name so I'll keep on track.....hopefully!

Now I know GK has made something similar on STV so you're sure to find a tutorial over there. I had mine started before this so made it up as I went along.
I wasn't too sure about this project .......... until a friend saw it sitting at the back of my desk and asked if she could have one.... that was it, I had to finish it off and post it here. So.... on to the next one.

Till next time..........


Tuesday 2 February 2010

Sweet Melissa - Boxed Cards


Hi Blogger's,

Time to catch up and show you the boxed cards I promised to show a while back.
Sweet Melissa is a pretty digi image from Squigglefly and the artist is Cheryl Alger.
I've added Mulberry Roses, punched fern and scalloped lace for this card.
I added a little stamping on the inside too. Not sure you can see it very clearly here.
This card was made for a friend of mine who has made two quilts for her nieces. She wanted something for the families to keep as well as use. I've made a box for presentation and covered the top with some pretty paper and a stamped flower.
Pink, Lemon and green made up the colours of this set the second one was made in purple, lemon and green.

This card made use of the Spellbinders Labels dies and Martha Stewart butterfly punch. Add some Kaiser pearls, ribbon and some pretty flowers. The dp is from my Kaisercraft 6 x 6 paper pad Lilac Avenue Collection.

The inside got some stamping too and this one also sits in a presentation box.


I'm smiling as I type this ..... looking at all these pictures that were taken all around the house and out in the garden!!!!
I am trying to get all my pictures sorted out so you don't get all the background stuff...... just be patient with me for a while..... I'll get there!!

Thanks for dropping by again today, leave me a comment and let me know what you think of these if you can. Thanks so much.

Till next time.............

Monday 1 February 2010

Magical Monday


Hello Blogger's,

Two projects to post today - first

Magical Monday with TMITA/PCC has rolled around again and this week Nina is sharing this beautiful bear.....I just love the expressions Nina gives all her images.

I got to choose the challenge this week and asked that you use the image for a Valentine gift tag with some stitching included somewhere. It could be hand or machine stitching or even faux stitching drawn on your project.

Here's my tag:

I got the Pazzle out to have a play and designed this shaped tag from scratch, (can't tell you how pleased I was). It's cut twice from some red card.
The layer of dp is stitched all around with just some punched lace at the bottom. My stitched ribbon covers the join and I added the silver heart charm to finish off this section.
The bear was sized and printed onto Pure Luxury pure white card and cut using a Spellbinder Classic Oval die. I lightly coloured the rim of the oval.
The scalloped oval was cut from the same red card as the tag.
My bear is coloured with Copics and I used a Spellbinder heart die to cut the raised heart.
The sentiment was hand written.
I've attached some Mulberry paper roses and punched some fern to sit under these. Some heart embellishments are tucked into the spray and one heart gem was added to finish the front.
Once this was completed I attached the second tag to the back to cover the stitching.


Hope you're not put off making this tag - remember it could always be the centrepiece of a card!

If you play along with us this week and are the randomly picked winner this is what you could win............... Just in time for all those Valentine projects.


I'm really looking forward to seeing your projects this week .

I'm entering my tag in the following challenges:


The second card is for Andrea's CAS sketch challenge SS300110 as well as a couple of other challenges in blogland this week.
For those who don't know Andrea she is Annabella Stamps an Australian Company from Melbourne. Those of you who visit regularly will have seen some of my cards in both Andreas blog CAS challenge and the Annabelle Stamp Bling Sketch challenge. You should come and join in the fun. You can use any stamps, though naturally Andrea would love it if you tried some of hers!! I have they're some of the best clear stamps I've used. Enough rambling from me........... Here's my card:
I sat down after the Men's final tennis match last night and made this card and I'm really pleased with it. Soft and pretty........ I'll admit there's SU stamp (Sassy Stems) SU paper too!
I coloured the flowers and vase with Copic markers the dp is from my box of scraps (sorry).
Base card is GKD Pure Luxury in pure white. I added 3 Kaisercraft pink gems and a button from my stash, which has a length of soft pink ribbon threaded though the buttonholes and tied in a bow.
You might just see that I added a row of punched out daisies on the inside of this card - I am trying to decorate a bit more than the front of my cards this year!

Hope you will join in with Andrea's challenge, she has very kindly added 2 lots of yummy candy for two randomly picked winners. I've given you the links above and for Annabella Stamps, click here to check out all the stamps, bling etc that Andrea has available.

I'm entering my card in the following challenges:

Andrea's Stamping Moments - SS300110 sketch
Cute card Thursday - Blooming gorgeous

Thanks for dropping by ............Till next time..........

Edit: I meant to thank Mary Anne, Carol and Diana for awarding me with the 101 award. I'm grateful that you thought of me and I have passed this award on in a previous post.