
Hello.........how is everyone?
I'm just popping in to share a little project I made for the Heartfelt Creations Blog this week. You can check all the Design Team cards here too. If you want individual blogs check under the DT Tab at the top of my page.
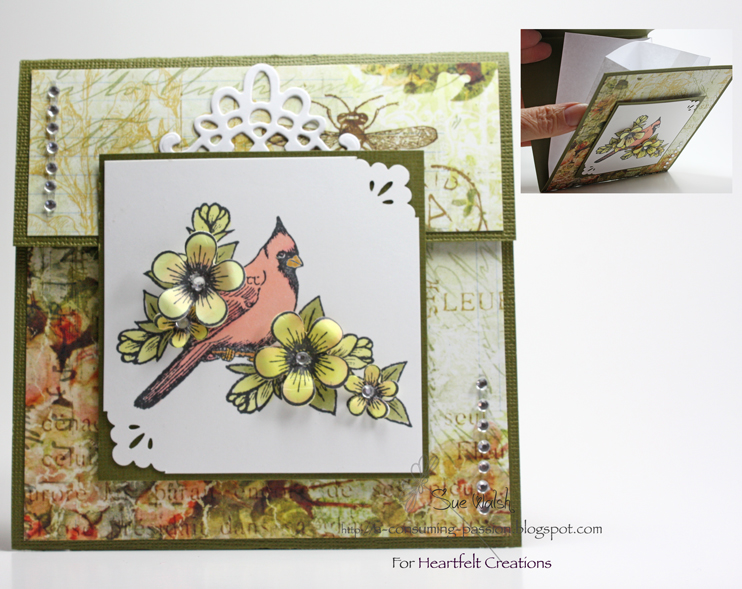
click on the picture to see it a little clearer.
Here's how:
5-inch
square.
HC
Products: HCPC 3388 Spring
Cardinals PreCut Set
HCPC 3303 Posy Patch Flowers PreCut Set
HCD 701 Posy
Patch Die
HCD 702
Butterfly Border Die
Other
Products: Pink Paislee – Butterfly
Garden dsp. Green Coredinations Card. X-Press It Blending Card – White. 2 white envelopes. Memento Tuxedo Black Ink.
Copic Markers. Clear gems. Foam Mounting Tape, Dries Clear Adhesive Zip Dry
glue. ScorPal. Fiskars – something old something new corner punch.
Instructions:
1.
Trim the green card to 5 inches 12 inches and
score at 5 and 10 inches.
2.
Trim another piece of the green card to 3.25
inches square.
3.
From the dsp cut two pieces one 4- 7/8” square
and the second at 4 -7/8 x 1-3/4 inches. Use these pieces to layer the front
and flap.
4.
Die cut the Corner flourish from white card and
add it to the front of the card flap.
5.
Seal the two envelopes before trimming the tops
to give a 4-½ inch pocket. Add a line of
Zip dry to join the envelopes, leaving the top open.
6.
Do the same again to adhere the joined envelopes
to the card back. Once more to join the envelopes to the card front.
7.
Stamp the image to X-Press It Blending card and
colour with Copic markers. Trim to 3-1/8
inches square and using the punch, punch opposite corners. Layer this to the 3” square green card.
8.
Stamp 4 posy petals to match the card front and
using the matching dies cut out. Colour with Copics .
9.
Shape the petals before adding them to the card
front using Dries Clear adhesive. Add a
clear gem to the centre of each.
10 To
the bottom of the completed image 3-inch square add a strip of foam mounting
tape. Position this over the card front, so the top tab can sit
just under the square to secure.
11 Add
two rows of clear gems to complete.

10 comments:
gorgeous, I love all the bird stamps & your cardinal is gorgeous
Gorgeous creation! You are so great about giving instructions and it is so much appreciated. Have a wonderful weekend! "Hugs" Carol
Sue this is gorgeous. I love the design paper you used for this pretty image.
I just love this card design, Sue. You are just too creative for words.
OMGosh Sue this is amazing... perfection!
Beautiful!
Hello Sue .What a fab project .Truly inspirational and I'm off to try it out . Love that image and your colouring .
Beautiful card Sue great instructions thanks for sharing. Hugs xx
so elegant Sue! I love how you have popped up the beautiful blooms to create depth!
Lovely pocket card. your birdie and flowers are gorgeous.
Post a Comment